Beef And Cheese Chimichanga
I. Introduction
A. What is a Beef and Cheese Chimichanga?
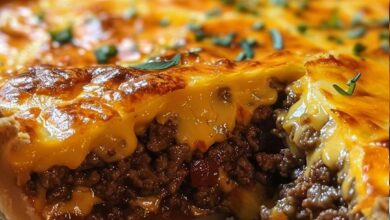
A beef and cheese chimichanga is a popular Tex-Mex dish consisting of a flour tortilla filled with seasoned ground beef, cheese, and other savory ingredients. This dish is then deep-fried or baked until crispy and golden brown, resulting in a delicious and satisfying meal.
B. Brief history and origin
The chimichanga is said to have originated in Arizona, United States, with various claims to its invention. Despite its disputed origins, the chimichanga has become a beloved dish in Mexican and Southwestern cuisine, enjoyed by people around the world.
II. Ingredients
To make beef and cheese chimichangas, you will need:
- Flour tortillas
- Ground beef
- Onion
- Garlic
- Bell peppers
- Jalapeños (optional for heat)
- Mexican blend cheese
- Refried beans
- Seasonings (such as chili powder, cumin, paprika, salt, and pepper)
- Oil for frying or cooking spray for baking
-
III. Preparation
A. Preparing the filling
- In a skillet, brown the ground beef with diced onions, minced garlic, diced bell peppers, and jalapeños (if using).
- Season the beef mixture with chili powder, cumin, paprika, salt, and pepper to taste.
- Once the beef is cooked through and the vegetables are tender, remove the skillet from heat and let the mixture cool slightly.
- Stir in refried beans and shredded Mexican blend cheese until well combined.
B. Assembling the chimichangas
- Lay out a flour tortilla and spoon the beef and cheese filling onto the center of the tortilla.
- Fold the sides of the tortilla over the filling, then roll it up tightly to form a chimichanga.
- Secure the ends with toothpicks to prevent them from unraveling during cooking.
IV. Cooking Method
A. Frying the chimichangas
- Heat oil in a deep fryer or skillet to 350°F (175°C).
- Carefully place the chimichangas into the hot oil, seam side down, and fry until golden brown and crispy, about 2-3 minutes per side.
- Once cooked, remove the chimichangas from the oil and drain them on paper towels to remove excess oil.
B. Baking option for a healthier alternative
- Preheat your oven to 400°F (200°C).
- Place the assembled chimichangas seam side down on a baking sheet lined with parchment paper.
- Lightly spray the chimichangas with cooking spray to help them crisp up in the oven.
- Bake for 20-25 minutes, or until the chimichangas are golden brown and crispy.
-
V. Serving Suggestions
Serve the beef and cheese chimichangas hot with your favorite toppings and accompaniments, such as salsa, guacamole, sour cream, and shredded lettuce. You can also serve them alongside Spanish rice and beans for a complete meal.
VI. Variations
- Substitute the ground beef with shredded chicken or pork for a different flavor.
- Add diced tomatoes, corn, or black beans to the filling for added texture and flavor.
- Experiment with different types of cheese, such as cheddar or pepper jack, for a unique twist.
VII. Tips and Tricks
- Make sure to seal the chimichangas tightly to prevent the filling from leaking out during cooking.
- If frying, do not overcrowd the fryer or skillet to ensure even cooking.
- For a crispier texture, you can double fry the chimichangas by frying them once, letting them cool, and then frying them again until golden brown.
VIII. Health Considerations
While delicious, chimichangas are often high in calories and fat due to the frying process. To make them healthier, consider baking them instead of frying and using lean ground beef or turkey and reduced-fat cheese. You can also load them up with plenty of veggies for added nutrition.
IX. Conclusion
Beef and cheese chimichangas are a flavorful and satisfying dish that brings together the bold flavors of Tex-Mex cuisine. Whether fried or baked, these crunchy delights are sure to please your taste buds and become a favorite in your meal rotation.


