Deck Water Feature
Amid the meticulous process of rejuvenating our rear deck, an opportune moment arose to incorporate a captivating aquatic installation.
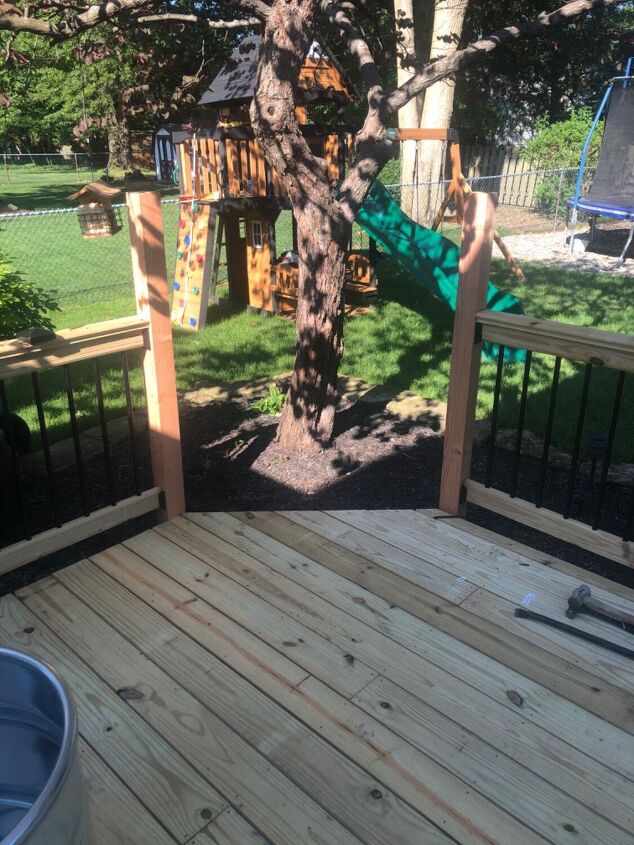
Determine layout: During the refurbishment of this deck, we upheld the existing framework, opting to revamp the upper deck boards, posts, and rails. Remarkably, a corner orientation emerged as the ideal site for my envisioned creation.
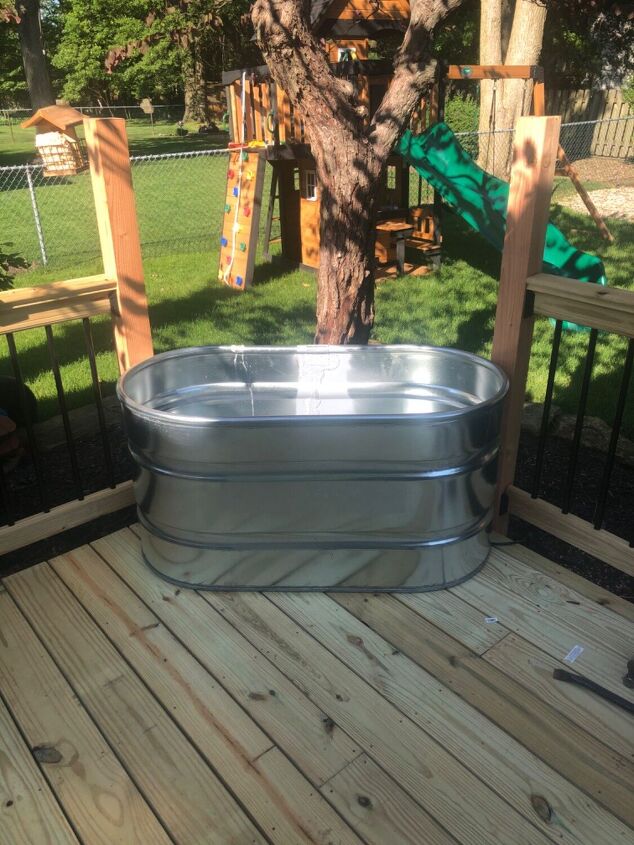
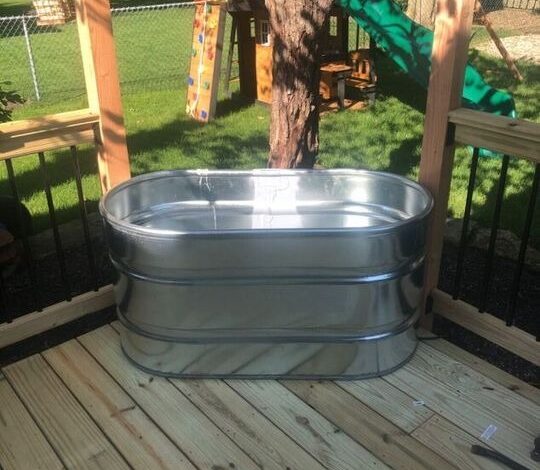
Test fit: Employing a four-foot water trough, I strategically positioned it between the two posts to ensure its harmonious integration while conserving valuable deck space. This calibration proved to be impeccably fitting.
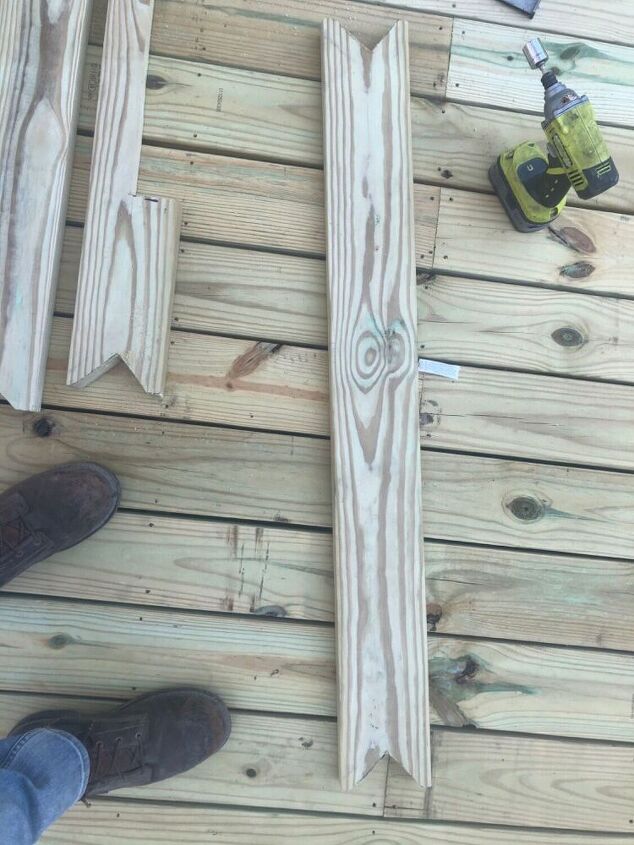
Making braces: Fashioning a brace from a 2×6 plank, tailored to match the span between the two posts, I carefully positioned the plank atop the posts, meticulously aligning and delineating the angles. Utilizing a jigsaw, I deftly carved out each corner, facilitating a snug interlocking of the brace with the posts. Two identical reinforcements were subsequently fashioned.
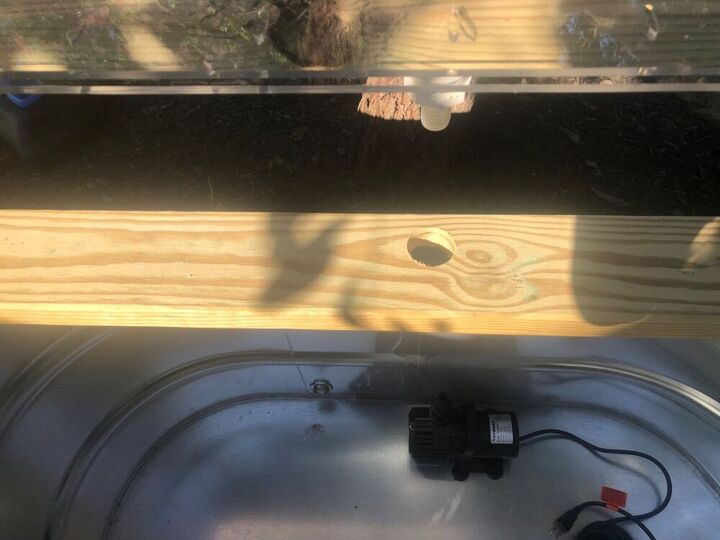
Drilling for plumbing: Once the primary brace was firmly in place, I positioned the spillway to verify that the inlet aligned centrally. Armed with the dimensions of the tubing, I proceeded to bore a hole measuring one and a half inches in diameter.
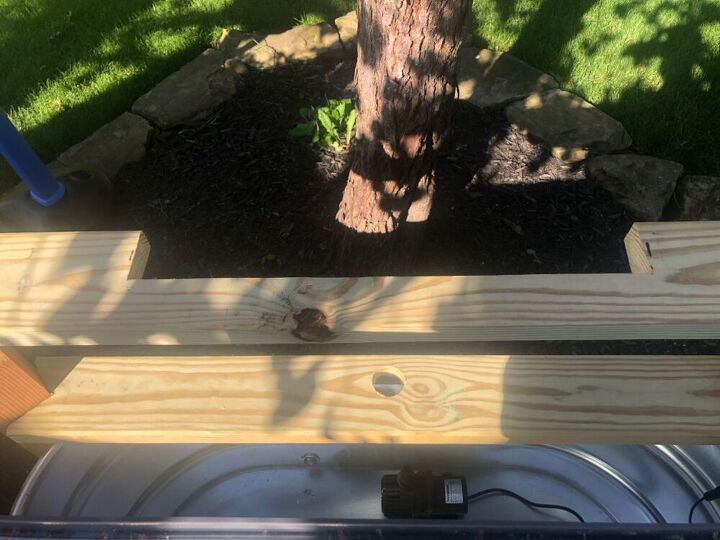
Second brace: With the first brace affixed and the hole duly drilled, I pondered the optimal elevation for the overflow. A lofty positioning risked splashes and subsequent water loss, while a lower placement compromised the auditory and visual aesthetics. After due consideration, I settled upon a distance of approximately sixteen inches from the apex of the trough. This served as the anchoring point for the second brace, which was meticulously notched to accommodate the spillway.
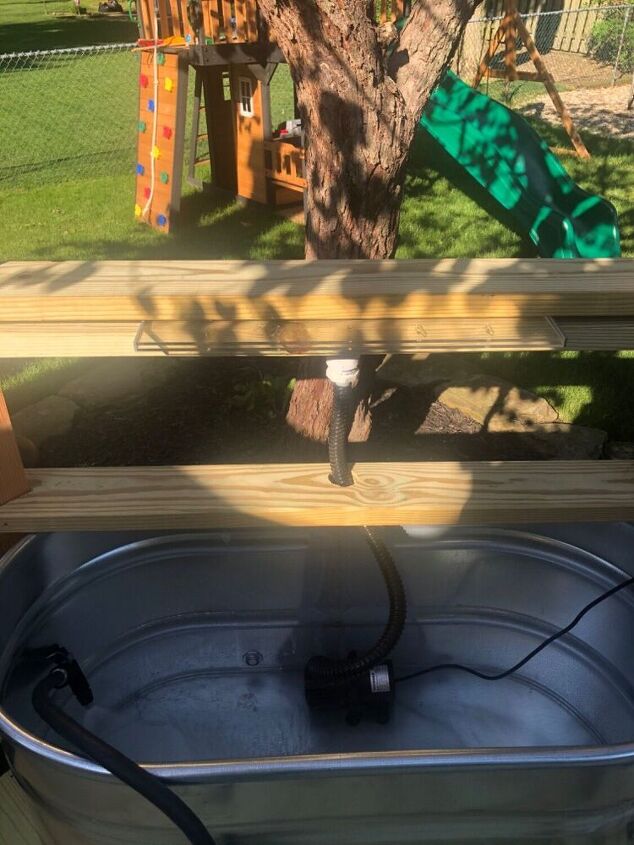
Set spillway: Nestling the spillway into the previously carved recess, I slightly tilted it forward to promote fluid flow. Introducing the third brace atop it, I exerted a gentle pressure to secure the spillway firmly in position. Concurrently, I channeled the tubing through the pre-drilled aperture, establishing a connection between the spillway and the pump discreetly nestled at the trough’s base.
Test run: Upon completing the assembly and connections, I introduced a modicum of water into the trough, initiating a preliminary assessment. This step ensured the adequacy of the pump’s capacity to supply the spillway. A 700-gallon-per-hour pump proved to be ample for the 24-inch spillway in my case.

Back view: Shifting focus to the rear perspective, the unobtrusive complexity of the plumbing connections was laid bare. Concealment will be achieved through the use of galvanized metal, facilitating facile removal for water drainage or any necessary repairs.
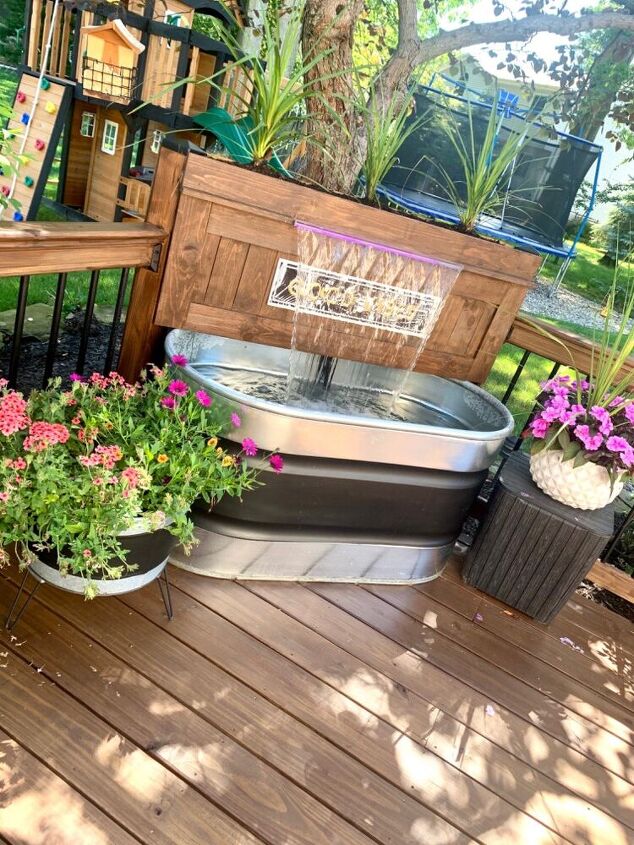
Close it up: Having achieved operational success, I deftly employed a selection of fence picket boards to shroud the plumbing infrastructure. Simultaneously, this endeavor yielded a quaint elevated planter. While not characterized by substantial depth, it bestows a visually pleasing accent. The culmination of this project saw the application of deck stain to harmonize with the existing deck and its freshly installed railings. Electrical wiring was extended from an extant outlet, augmented by an outdoor extension cord operated via a timer.
EXPERIENCE THE ENCHANTMENT!!!